

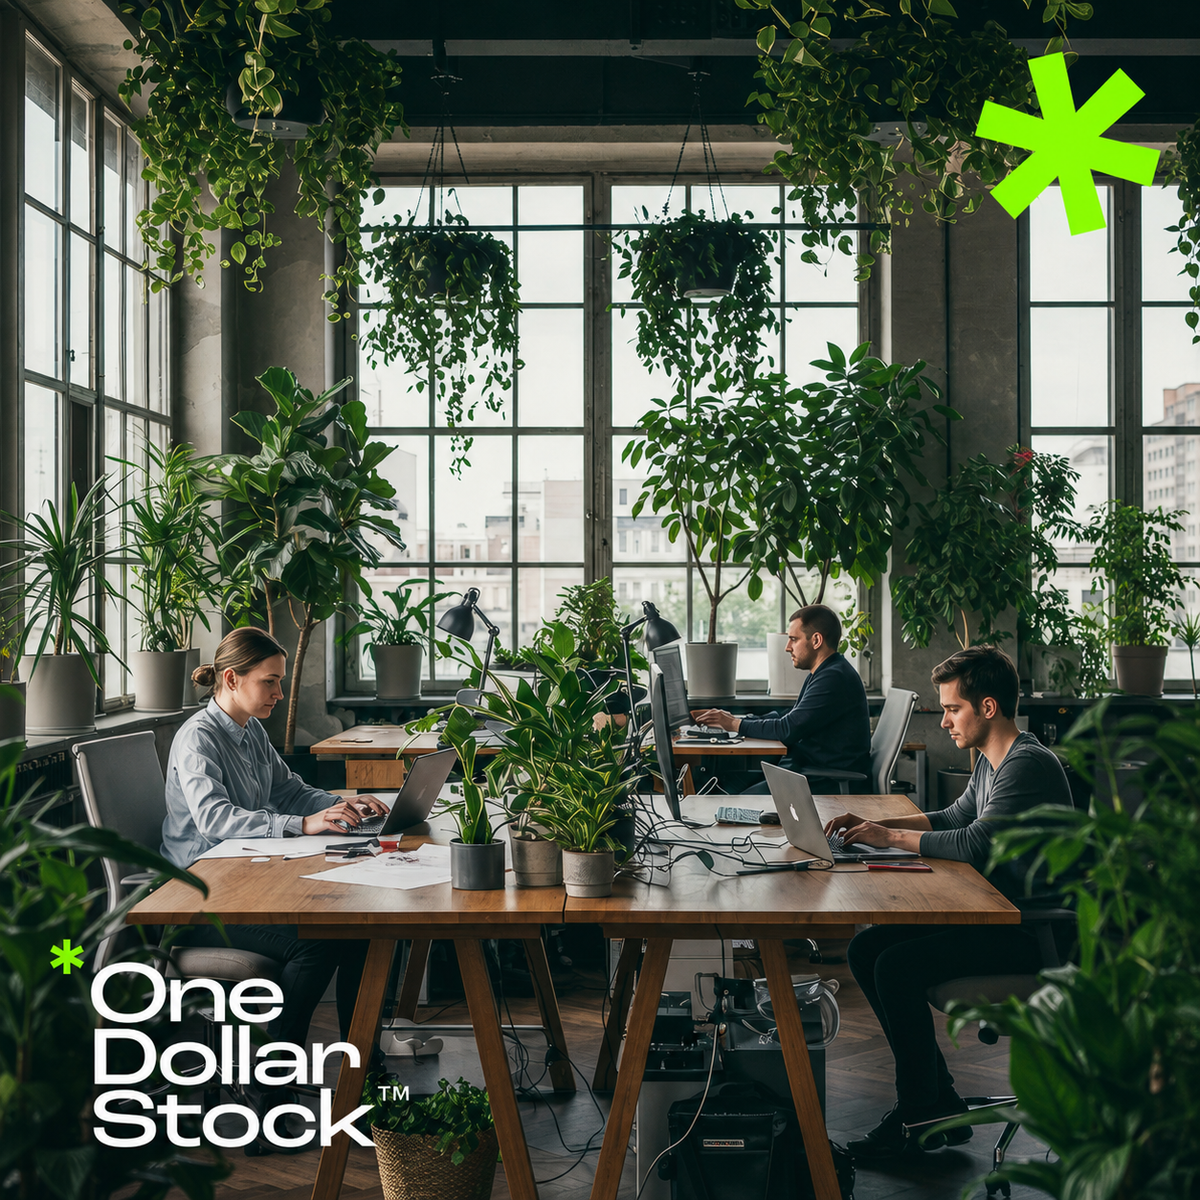
How to Avoid Generic AI-Looking Visuals in Brand and Marketing Content
Generic AI-looking visuals make brands harder to recognize. This guide explains how to avoid them using curated stock images, mockups, textures, overlays, presets and a clear visual direction -- so your marketing content feels intentional, not interchangeable.
What Is a Visual Asset Stack? A Practical Guide for Small Creative Teams
A practical guide for small businesses, agencies, marketers and creators who need faster websites, campaigns, social content and client work without managing scattered creative subscriptions. Learn what a visual asset stack is, what it includes, and how to build one that actually works.

How to Create a Website in 1 Hour Using OneDollarStock
How to Create a Website in 1 Hour Using OneDollarStock If you want to create a website in 1 hour using OneDollarStock, the good news is that it is completely realistic when you use the right creative assets in the right order. Most people waste time on design decisions, visual consistency, and hunting for files. The faster way is to build a clear workflow first, then use ready-to-go assets that help you move from blank page to polished site without getting stuck. This guide shows exactly how to create a website in 1 hour using OneDollarStock step by step. It is built for founders, marketers, creators, freelancers, agencies, and small businesses that need a site live fast. Instead of treating website creation like a giant design project, this article breaks it into focused stages you can actually complete. You will learn how to use website templates, stock images, mockups, textures, overlays, presets, and LUTs together so your final site looks sharper, feels more intentional, and takes a fraction of the time to build. Why Creating a Website in 1 Hour Is Possible With the Right Asset Workflow The main reason websites take too long is not coding. It is indecision. People lose hours picking fonts, searching for visuals, replacing bad images, redesigning sections, and trying to force random assets into one coherent look. When you create a website in 1 hour using OneDollarStock, you skip most of that chaos. You start with a strong visual system and use pre-made assets that already solve the hard parts. Instead of creating everything from scratch, you assemble a website with better speed and fewer weak points. This matters for businesses that need to launch quickly. A founder validating an idea, a freelancer building a portfolio, a restaurant updating its online presence, or an agency shipping a landing page for a client does not need more friction. They need a fast, repeatable process. Templates reduce layout time Images improve quality instantly Mockups make offers look more real Textures and overlays add brand depth Presets and LUTs create visual consistency That combination is what makes a one-hour website build possible. What You Need Before You Create a Website in 1 Hour Using OneDollarStock Before you open your website builder, get your inputs ready. This is where a lot of speed is won. If you go in without structure, the hour disappears fast. Prepare Your Website Goal Pick one goal only. Do not try to make the website do everything: collect leads, sell a product, show a portfolio, present a service, or launch a brand landing page. A focused site is easier to build and converts better. Prepare Your Core Copy You do not need perfect copy. You need enough to fill the key sections: a headline, a short subheadline, three core benefits, one call to action, and one trust element such as a testimonial, result, or guarantee. If you already have these ready, you save huge time during the build. Prepare Your Asset Direction Choose one visual direction before you begin. Clean and minimal, bold and energetic, premium and editorial, warm and human, or modern and tech-focused. This helps you choose the right OneDollarStock products faster and keeps the website from looking random. Step 1: Start With a Website Template to Save the Most Time If you want to create a website in 1 hour using OneDollarStock, starting from a blank page is the worst move. The fastest path is to begin with a ready-made Framer website template that already solves structure, hierarchy, spacing, and layout flow. A strong template gives you a homepage framework immediately. Instead of asking what goes where, you only need to replace content and visuals. That cuts decision fatigue fast. Salifact: Automation SaaS Website Framer Template → Founders launching an MVP, marketers building campaign pages, creators making personal websites, and agencies handling fast-turnaround client work all benefit from templates because they reduce the slowest part of web design: the beginning. The first rule of building fast is simple. Borrow structure. Customize meaning. A good website template should already give you a strong hero section, clear content blocks, call to action sections, responsive spacing, and a layout style that fits your niche. If your goal is speed, do not over-customize the structure. Focus on replacing assets and tightening the message. Step 2: Use Stock Images to Make the Website Look Professional Fast Once your layout is in place, the next biggest upgrade comes from visuals. Stock images are one of the fastest ways to make a website feel complete, credible, and usable. This is where OneDollarStock becomes especially useful because you can quickly build a site with visuals that look intentional instead of filler. When people say a website looks polished, they are often reacting to image quality, image fit, and visual consistency more than anything else. Use stock images that reflect your audience and use case. If the website is for a cafe, do not use sterile corporate laptop scenes. Relevance matters more than volume. Choose images that are visually aligned. Similar lighting, similar color mood, and similar composition will make the entire site feel more designed. Pick images with usable negative space, especially if you want to place headlines or interface elements on top. Strong website images should explain the offer visually, create emotional tone, add credibility, or support scannability. If an image does none of those, it is probably decoration, not a useful asset. Step 3: Use Mockups to Present Products, Offers, or Downloads Better One of the easiest ways to make a website look more valuable is to show your offer inside a mockup. Mockups help users understand what they are buying, what they are signing up for, or what they will receive. That makes them especially useful for digital products, service packages, presentations, courses, templates, and app concepts. Browse the full editable mockups collection to find the right format for your offer. Man Holding a Phone Mockup (editable, layered PSD file) → Mockups add context. Context increases trust. They make digital products feel tangible, improve hero sections, help product blocks look more complete, and can replace weaker screenshots. If you are building a site for an ebook, online service, creative pack, branding offer, or digital toolkit, mockups can carry a lot of visual weight. The hero section is a strong place to use a mockup because it creates a fast first impression. For service businesses, you can also use mockups to frame deliverables such as audit documents, strategy decks, social media plans, or onboarding materials. The man holding a tablet mockup works especially well for app presentations and digital service pages. Step 4: Use Presets and LUTs to Create a Consistent Visual Identity If you want your website to look cohesive in one hour, consistency matters more than perfection. This is where Lightroom presets and LUTs help. Instead of editing every image from scratch or accepting visual mismatch, you use presets for photos and LUTs for video stills or moving visuals to create a more unified style. This is especially useful when your site includes multiple images from different shoots, different creators, or different sources. Water Tones Presets (13 XMP files) → Presets let you batch-edit images so they share similar brightness, contrast, tone, warmth, mood, and color balance. Even small visual consistency makes a site feel more premium. If your brand direction is soft and editorial, a preset can reduce harshness and make your visuals feel aligned. If your brand is bold and modern, a different preset can increase contrast and punch. LUTs are useful when your website includes video banners, social proof clips, product reels, founder videos, or embedded campaign content. If those visuals all feel different, the site starts to look stitched together. LUTs help bring visual harmony to video elements. When users move across a site and the visual language feels stable, the whole brand feels more deliberate. Step 5: Use Overlays and Textures to Add Depth Without Slowing the Site Down A lot of fast websites look flat. They have structure, but no atmosphere. This is where overlays and website textures can make a big difference. Used carefully, they add visual depth, character, and uniqueness without forcing a full redesign. Subtly Textured Gold Textures (20 JPG files) → Textures work well in section backgrounds, banners, cards, separators, and brand moments. A subtle paper texture, grain texture, fabric texture, or organic surface can make a page feel warmer and less sterile. This works especially well for creative brands, editorial businesses, hospitality, beauty, food, fashion, and premium service sites. For natural, organic brand aesthetics, the spalted maple wood textures are a strong choice for section backgrounds and card elements. Overlays can be useful for hero images, call-to-action visuals, campaign pages, and promotional blocks. They add mood, movement, and emphasis. The important thing is moderation. If the overlay fights readability, remove it. Good depth supports clarity. Bad depth competes with it. Step 6: Build the Core Website Sections in the Right Order If you only have one hour, section order matters. Do not jump around randomly. Build the website from highest impact to lowest impact. Hero section Main offer or features section Social proof or trust section About or brand section Call to action section Footer This order works because it prioritizes what users actually need first. Most websites do not fail because the footer is weak. They fail because the message is unclear, the visuals are generic, and the first screen does not make the offer obvious. Your hero should answer three things quickly: what is this, who is it for, and what should I do next. Add one strong headline, one supporting line, one button, and one key visual. That visual can be a stock image, a mockup, or a styled product frame using overlays or textures. For the features section, keep it tight. Use three to four core benefits, not ten. Pair each feature with a relevant visual if possible. For the trust section, include testimonials, logos, before-and-after visuals, case snippets, star ratings, or outcomes. Even if the website is simple, trust elements help it feel finished. Step 7: Keep the Website Simple Enough to Finish in One Hour The fastest websites are not the ones with the most sections. They are the ones where every section has a job. If you are serious about creating a website in 1 hour using OneDollarStock, you need to avoid feature creep. Cut too many pages, fancy animations everywhere, overwritten copy, too many colors, too many image styles, and sections that repeat the same message. Keep the first version lean. A website that is live and clear beats a half-finished masterpiece every time. Usually one strong landing page or homepage is enough. If you move fast, you might also finish a contact page or simple product page. But the smartest approach is to launch one strong page first, then expand later. Speed comes from narrowing the scope. Best OneDollarStock Products to Use When You Create a Website Fast If your goal is building quickly, some product types have a bigger impact than others. Here is the smartest priority order for a one-hour website build. Framer Templates save the most time because they solve structure first. Images create immediate polish and relevance. Editable Mockups increase product clarity and perceived value. Textures add atmosphere and brand depth. Overlays enhance visuals when used lightly. Presets help unify photo content across the site. LUTs help unify video and motion-based content if your site uses them. This order helps because it focuses first on structure, then on image quality, then on visual refinement. Common Mistakes When You Try to Create a Website in 1 Hour Fast builds go wrong when people confuse speed with randomness. The goal is not to rush badly. The goal is to make fast decisions that still support a good result. Using too many asset styles is the most common trap. If your images feel editorial, your mockups feel corporate, your textures feel grungy, and your overlays feel futuristic, the site becomes visually confused. Use fewer styles and repeat them well. Writing too much copy also slows the build and often weakens the design. And choosing visuals before the message is backwards. Pick the main offer first, then choose assets that make the offer clearer. Do not try to reinvent the template either. Most of the time, your fastest win is replacing content inside a good structure, not redesigning every block. What to Avoid if You Want a Website That Looks Fast but Not Cheap There is a difference between efficient and unfinished. A website can be built quickly and still feel premium if you avoid a few common traps: low-resolution visuals, mixed color temperatures, an overcrowded hero section, generic filler photos, effects used just because they are available, and launching without checking spacing or mobile layout. Take five minutes at the end to review spacing, button clarity, and image consistency. That final check can make a fast site feel much more intentional. How to Create a Website in 1 Hour Using OneDollarStock: A Realistic 60-Minute Workflow Here is a practical one-hour build system you can actually follow. Minute 0 to 10: Pick the closest-fit template from the Framer Templates collection. Replace logo, colors, and main headline. Do not overthink it. Minute 10 to 20: Swap in stock images for the hero, about, and supporting sections. Keep them consistent. Minute 20 to 30: Place mockups from the editable mockups collection where users need more clarity around what they get. Minute 30 to 40: Shorten headlines, simplify benefit blocks, and make the main button clear. Minute 40 to 50: Add textures or overlays only where they improve the page. Keep it subtle. Minute 50 to 60: Check spacing, readability, button hierarchy, and overall consistency. Remove anything that feels extra. This timeline works because it forces focus. It is easier to create a website in 1 hour when each part of the build has a job and a time limit. Why This Workflow Works for Founders, Marketers, and Small Teams Most small teams do not have the luxury of waiting weeks for a polished website. They need fast launch systems. That is exactly why asset-based workflows are so practical. Instead of making every visual decision from zero, you use a library of strong parts and assemble a better result faster. Founders can test ideas faster. Marketers can launch campaigns faster. Creators can present themselves faster. Agencies can reduce delivery time without lowering quality. That is the real value of using OneDollarStock for web creation. The asset library approach is not about cutting corners. It is about removing unnecessary friction from the process. Conclusion: The Fastest Way to Create a Website in 1 Hour Using OneDollarStock If you want to create a website in 1 hour using OneDollarStock, the smartest move is to stop thinking of website creation as one huge task. Break it into a fast asset workflow. Start with a Framer template, add strong stock images, use mockups where clarity matters, unify visuals with presets or LUTs, and add textures or overlays only where they improve the page. This approach works because it matches how real businesses operate. You do not always need a custom design process from scratch. Sometimes you need a website that is clear, attractive, on-brand, and ready today. With the right asset system, that is not just possible. It is repeatable. The faster you can build without making the site look rushed, the more useful your workflow becomes. That is exactly where OneDollarStock fits in. Q&A: How to Create a Website in 1 Hour Using OneDollarStock Can I really create a website in 1 hour using OneDollarStock?Yes, if you start with a template, keep the scope small, and use ready-made assets in a clear order. A one-page website or landing page is the most realistic format for a one-hour build. What OneDollarStock products are most useful for website creation?Templates, stock images, and mockups have the biggest immediate impact. Textures, overlays, presets, and LUTs help refine the site and improve visual consistency. Should I use presets and LUTs for a website?Yes, especially if your site includes multiple images or videos from different sources. Presets help unify photos, while LUTs help unify video content and visual tone. What kind of website can I build in one hour?You can realistically build a homepage, landing page, simple portfolio, service site, or product page. The key is limiting the number of sections and pages. Do mockups help website conversion?They can. Mockups help users understand what they are getting, especially for digital products, service deliverables, downloadable files, and visual offers. How many visuals should I use on a fast website?Use only what supports the page. One strong hero visual, a few supporting images, and one or two clear product presentation visuals are often enough. What is the biggest mistake when building a website fast?The biggest mistake is adding too much. Too many sections, too many styles, and too many effects make the site slower to build and weaker to use. Who is this workflow best for?It is best for founders, creators, marketers, freelancers, small businesses, and agencies that need a polished website live quickly without a heavy production process.

Editable PSD Mockups for Modern Brands: Why OneDollarStock's New Mockups Are Changing the Creative Workflow
Editable PSD Mockups for Modern Brands: How to Present Your Work Like a Pro If you have ever spent hours trying to make a product shot look realistic, a packaging design look shelf-ready, or a social media concept look polished enough to show a client, you already know the problem. Great ideas deserve great presentation. And editable PSD mockups are one of the fastest ways to get there. OneDollarStock has just expanded its creative asset library with a new collection of editable PSD mockups built specifically for modern brands, agencies, and independent creators. These are not generic filler files. They are practical, professionally designed smart-object templates that let you drop in your design and export a finished visual in minutes. This article breaks down what makes editable PSD mockups worth using, how to use them in Photoshop even if you are not an advanced designer, and why this new category fits perfectly into what OneDollarStock has always been about: affordable, creator-first tools that actually work. What Are Editable PSD Mockups and Why Do They Still Matter? A PSD mockup is a layered Photoshop file that places your design inside a realistic scene. Think a coffee cup with your logo on it, a tote bag showing your print, a phone screen displaying your app UI, or a packaging box with your label applied. The scene is already built. You just replace the placeholder with your artwork. The reason PSD mockups remain the industry standard is control. Unlike static image generators or browser-based tools, a PSD file gives you full access to every layer. You can adjust shadows, change backgrounds, tweak lighting, and export at any resolution you need. That flexibility matters when you are working across multiple formats or delivering assets to a client who has specific requirements. For brands, agencies, and freelancers, editable PSD mockups are not a shortcut. They are a workflow upgrade. Best Uses for Editable PSD Mockups in Brand and Marketing Work The range of applications is wider than most people expect. Here are the most common and highest-value use cases: Product packaging presentations: Show a client how their label looks on a bottle, box, or pouch before anything goes to print. Social media content: Create scroll-stopping visuals for Instagram, Pinterest, or LinkedIn without a full photo shoot. Brand identity proposals: Present logos, color systems, and typography in context rather than on a white background. E-commerce product images: Give your online store a polished, lifestyle-adjacent look without hiring a photographer. Campaign mockups: Show how a design will look on a billboard, a tote bag, a t-shirt, or a business card before committing to production. Portfolio work: Make your design projects look finished and real, even when the client never moved forward with production. Each of these scenarios has one thing in common: the visual needs to look credible fast. PSD mockups make that possible without a studio, a photographer, or a production budget. How to Use Editable PSD Mockups in Photoshop: A Simple Step-by-Step Tutorial You do not need to be an advanced Photoshop user to get great results from a smart-object PSD mockup. The process is straightforward once you understand the structure of the file. Step 1: Open the PSD File Download your mockup from OneDollarStock and open it in Adobe Photoshop. You will see a layered file with clearly labeled groups. Most mockups include a dedicated smart object layer, often labeled something like "Your Design Here" or "Place Artwork." Step 2: Locate the Smart Object Layer In the Layers panel, find the smart object layer. It is identified by a small icon in the corner of the layer thumbnail that looks like a folded page. Smart objects are the key feature that makes mockups work. They allow your design to be placed inside the scene with perspective, shadows, and lighting already applied. Step 3: Double-Click to Open the Smart Object Double-click the smart object thumbnail. A new document will open. This is your canvas. It shows the exact dimensions and shape your design needs to fill. Delete the placeholder content and paste or place your own artwork here. Step 4: Replace the Placeholder with Your Design Paste your logo, illustration, pattern, or design into the smart object document. Scale and position it to fit the canvas. Keep it within the boundaries for the cleanest result. If your design has a transparent background, make sure the smart object background is set accordingly. Step 5: Save and Return to the Mockup Save the smart object document using Ctrl+S (Windows) or Cmd+S (Mac). Do not use Save As. When you save, Photoshop automatically updates the main mockup file with your design applied inside the scene. You will see the result immediately. Step 6: Adjust and Export Back in the main PSD file, review the result. You can turn layers on or off to change the background, adjust shadows, or switch color variants if the mockup includes them. When you are happy with the result, go to File, then Export, then Export As, and choose your preferred format. JPEG works for most web uses. PNG is better when you need transparency. The entire process typically takes under five minutes once you are familiar with the file structure. What Makes OneDollarStock PSD Mockups Different There is no shortage of mockup files on the internet. What separates a useful mockup from a frustrating one comes down to a few things: file quality, layer organization, smart object accuracy, and whether the scene actually looks realistic at export. OneDollarStock mockups are built with working creators in mind. The files are clean, the layers are labeled, and the smart objects are set up to work without needing to restructure the file before you can use it. The scenes are chosen for relevance to real brand and marketing work, not just for visual novelty. And because OneDollarStock operates on a pay-once model, you are not dealing with subscription tiers, download limits, or licensing confusion. You buy the asset, you own the right to use it. That clarity matters when you are working on client projects or building a commercial brand. Common Mistakes to Avoid When Using PSD Mockups Even with a well-built mockup file, a few common errors can undermine the final result. Here is what to watch for: Placing a low-resolution design: If your artwork is 72 DPI and the mockup is built for 300 DPI output, the result will look blurry. Always work with high-resolution source files. Ignoring the smart object canvas size: Your design should fill the smart object canvas proportionally. Stretching or squashing it will distort the final result. Saving over the original file: Always keep a copy of the original PSD. Work on a duplicate so you can reuse the mockup with different designs later. Skipping the shadow and highlight layers: Many mockups include optional overlay layers that add depth and realism. Turning these off can make the result look flat. Exporting at the wrong size: Match your export dimensions to the platform or use case. A social media post, a client PDF, and a print file all have different requirements. Editable PSD Mockups for Specific Brand Scenarios Different brand contexts call for different mockup types. Here is a quick breakdown of which mockup categories tend to deliver the most value for specific creative goals: For Product-Based Brands and E-Commerce Packaging mockups, label mockups, and product surface mockups are the most useful. They let you show how a physical product will look before it exists, which is essential for pre-launch campaigns, crowdfunding visuals, and investor decks. For Agencies and Brand Designers Stationery mockups, brand identity scene mockups, and device mockups are the go-to formats. They make brand proposals look finished and help clients visualize the system rather than just the individual elements. For Social Media Creators and Content Teams Phone screen mockups, tablet mockups, and lifestyle flat-lay mockups are the most practical. They let you show digital content in context, which performs significantly better on visual platforms than raw screenshots or white-background exports. For Apparel and Merchandise Brands T-shirt mockups, hoodie mockups, tote bag mockups, and cap mockups are essential for any brand selling or sampling printed goods. They eliminate the need for physical samples in early-stage product development and marketing. Why Affordable PSD Mockups Matter for Independent Creators and Small Brands Professional mockup photography is expensive. A single styled product shoot can cost hundreds or thousands of dollars depending on the studio, photographer, and props involved. For independent creators, small brands, and early-stage businesses, that cost is often not realistic. Editable PSD mockups close that gap. They give smaller operations access to the same quality of visual presentation that larger brands use, without the production overhead. When the mockups are also affordable to license, the barrier drops even further. This is exactly the space OneDollarStock was built to serve. The platform exists to give creators and brands access to professional creative assets at a price point that makes sense for real working budgets, not enterprise licensing departments. How PSD Mockups Fit Into a Modern Creative Workflow The best creative workflows are built around speed and flexibility. You need to move from concept to presentation quickly, iterate based on feedback, and deliver polished results without rebuilding everything from scratch each time. Editable PSD mockups fit naturally into that kind of workflow. You build your design in Illustrator or Photoshop, drop it into the mockup, export, and share. If the client wants a color change or a different background, you make the adjustment in minutes rather than hours. If you need to show the same design across five different product types, you use five mockups and export five files in a single session. That kind of efficiency compounds over time. The more mockups you have in your library, the faster you can respond to briefs, pitch ideas, and deliver work that looks finished from the first round. What to Look for in a High-Quality PSD Mockup File Not all mockup files are created equal. Before downloading or purchasing a PSD mockup, it is worth checking a few things: Smart object support: The file should use smart objects, not just flat layers. Smart objects are what make the design placement accurate and realistic. Layer organization: Well-labeled layers save time and reduce confusion. Look for files where the structure is clear from the moment you open it. Resolution: A good mockup file should be at least 3000 pixels on the longest side and built at 300 DPI for print-ready output. Realistic lighting: The best mockups use photography-based or carefully rendered lighting that makes your design look like it belongs in the scene. Clear licensing: Know what you can and cannot do with the file. Commercial use, client work, and resale rights are all different things. Editable PSD Mockups: The Next Step in OneDollarStock's Creative Asset Library OneDollarStock started with stock photography and has grown into a broader creative marketplace that includes Lightroom presets, overlays, textures, and now editable PSD mockups. Each addition to the library follows the same logic: give creators something they will actually use, at a price that does not require a business case to justify. The mockup collection is a natural extension of that mission. It fills a real gap in the workflow of anyone who creates visual content for brands, whether that is a solo designer, a small agency, a content team, or a brand owner doing their own creative work. The goal has never been to build the biggest stock library. It has been to build the most useful one for the people who actually do creative work every day. Conclusion: Editable PSD Mockups Are a Workflow Investment Worth Making Editable PSD mockups are not a trend. They are a practical tool that has been part of professional creative workflows for years, and they remain one of the fastest ways to produce polished, realistic visuals without a production budget. With OneDollarStock's new mockup collection, you get files that are built to work, priced to make sense, and designed for the kind of real creative work that brands, agencies, and independent creators do every day. Whether you are presenting a packaging concept, building a brand proposal, or creating content for social media, the right editable PSD mockup saves time and raises the quality of everything you put in front of a client or audience. Browse the full collection of editable PSD mockups at OneDollarStock and find the files that fit your next project.

